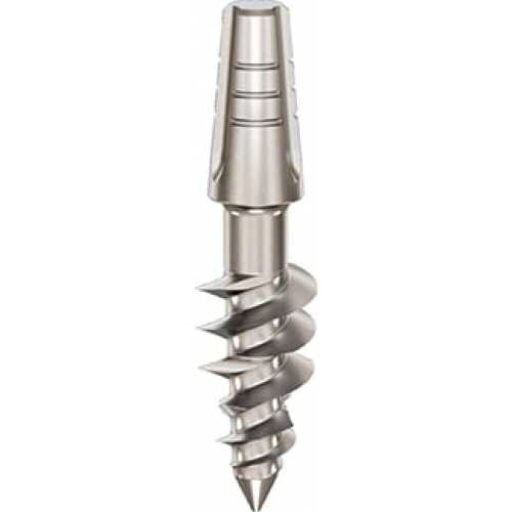
D1 bone is very dense cortical bone with limited trabecular component.
D1 bone gives strong mechanical resistance, but it is biologically less forgiving because dense cortical bone has a lower vascular supply than cancellous bone. The surgical risk is not lack of initial grip, but overheating, over-compression and reduced blood supply.
In clinical implant planning, D1 bone should not be treated as a simple label. It is a guide to how the bone may respond to drilling, compression, insertion torque and loading. The final diagnosis must always be based on CBCT assessment, clinical examination and tactile feedback during preparation.
Bone Location
D1 bone is most commonly associated with the anterior mandible, especially the interforaminal region between the mental foramina. Clinically this includes the mandibular symphysis and parasymphysis, where thick buccal and lingual cortical plates may remain even after tooth loss.
Important anatomical references for D1 bone include:
- anterior mandible
- interforaminal mandible
- mandibular symphysis
- mandibular parasymphysis
- buccal cortical plate
- lingual cortical plate
- basal mandibular cortex
For implant treatment, these structures matter because they influence primary stability, drilling resistance, heat generation, prosthetic distribution and the possibility of strategic cortical anchorage.
Clinical Significance
D1 bone gives strong mechanical resistance, but it is biologically less forgiving because dense cortical bone has a lower vascular supply than cancellous bone. The surgical risk is not lack of initial grip, but overheating, over-compression and reduced blood supply.
Drilling Protocol
Use full drilling or near-full drilling according to the implant system, sharp drills, abundant irrigation and controlled pressure. Avoid aggressive under-drilling in very dense cortical bone because it can create excessive compression.
Insertion Torque
Aim for controlled primary stability rather than the highest possible torque. Avoid excessive insertion torque and over-compression, especially with aggressive thread designs.
Healing Time and Loading Protocol
Early or immediate loading may be possible when implant distribution, prosthetic splinting and occlusion are controlled. The clinician should still be cautious because biological healing in very dense bone may be slower.
Implant Design
Less aggressive thread geometry, shallow threads or cortical anchorage designs are usually safer than very aggressive compressive designs in dense D1 bone.
Implant Types Relevant to D1 Bone
The implant type should be selected according to the bone available in each zone, not simply according to the name of the bone type. In advanced implantology, the same jaw may contain several different bone conditions, so a full-arch case may require several implant designs.
Ihde Dental BCS
BCS implants are relevant where cortical anchorage is the main objective. In very dense cortical zones, the clinician can use the cortical structure for mechanical fixation while avoiding unnecessary compression of the cancellous layer.
BasalFix Basal
The BasalFix Basal line is designed for cortical anchorage and engagement of the basal or second cortical plate. It is relevant where dense cortical structures provide the main support.
Monoimplant Smooth
Smooth Monoimplant fixtures are described for hard D1 and D2 bone. The smooth surface and sharp thread geometry may be useful when primary mechanical engagement is required, provided that compression and heat are controlled.
Monoimplant Microthread
Microthread Monoimplant may be considered where cortical penetration, socket wall support and immediate loading are part of the treatment plan.
Clinical Case Study: Dr Genchev and Severe Bone Atrophy
In Marie’s case, the most relevant D1 principle is the use of remaining hard cortical bone as a strategic anchorage resource. Dr Genchev used cortical fixation where cancellous bone was insufficient, especially in atrophied posterior maxillary zones with BCS implants. This reflects the D1 lesson: dense cortical bone is mechanically useful, but it must be engaged intelligently rather than compressed aggressively.
In the wider case, Dr Genchev treated a totally edentulous patient with severe bilateral bone atrophy. He selected different implant types according to the bone available in each zone: BCS for hard cortical anchorage, TPG Uno where cancellous and cortical bone were both available, and KOS Root where cancellous compression could provide primary stability. The case was restored with fixed PFM metal-ceramic bridges within five days.
Practical Summary
- D1 bone must be assessed with CBCT and clinical judgment.
- The drilling protocol should match the density and vascularity of the bone.
- Implant design should respect the biology of the bone, not only the desired torque value.
- Immediate loading depends on primary stability, implant distribution, prosthetic splinting and occlusal control.
- In atrophic jaws, strategic anatomical anchorage may be more important than the local density of the alveolar ridge alone.
FAQ – D1 Bone Density Questions
Where is D1 bone usually found?
D1 bone is most commonly found in the anterior mandible, especially the interforaminal region between the mental foramina.
Is D1 bone ideal for implants?
It can provide excellent primary stability, but it is not automatically ideal. Dense cortical bone has a poorer blood supply and is more vulnerable to overheating and over-compression.
Which implant designs are relevant in D1 bone?
Cortical anchorage implants and less aggressive thread designs are often appropriate. The exact choice depends on the implant system, CBCT findings and prosthetic plan.